 |
| Sisters? |
Found these two at the same place. Stamp in neck says TOP-TOY, but I haven't bothered to try and ID them yet (although some quick googling told med TopToy owns Toys'R'Us ETA: sorry, I can't read - they run the Scandinavian branch of Toys-R-Us, apparently, plus some other toystore chains, so that should narrow the search a bit). Gymnast style articulation, yay!
 |
| Different feet |
At first I thought they had the same body and was going to pick the best one, but then I noticed a few differences: one has flat "gymnast feet", while the other's are smaller and slightly ...arched, I guess? - and, most importantly, only one of them has articulated arms! And of course she's also the one with a badly yellowed torso, floppy joints and a cracked thingh...
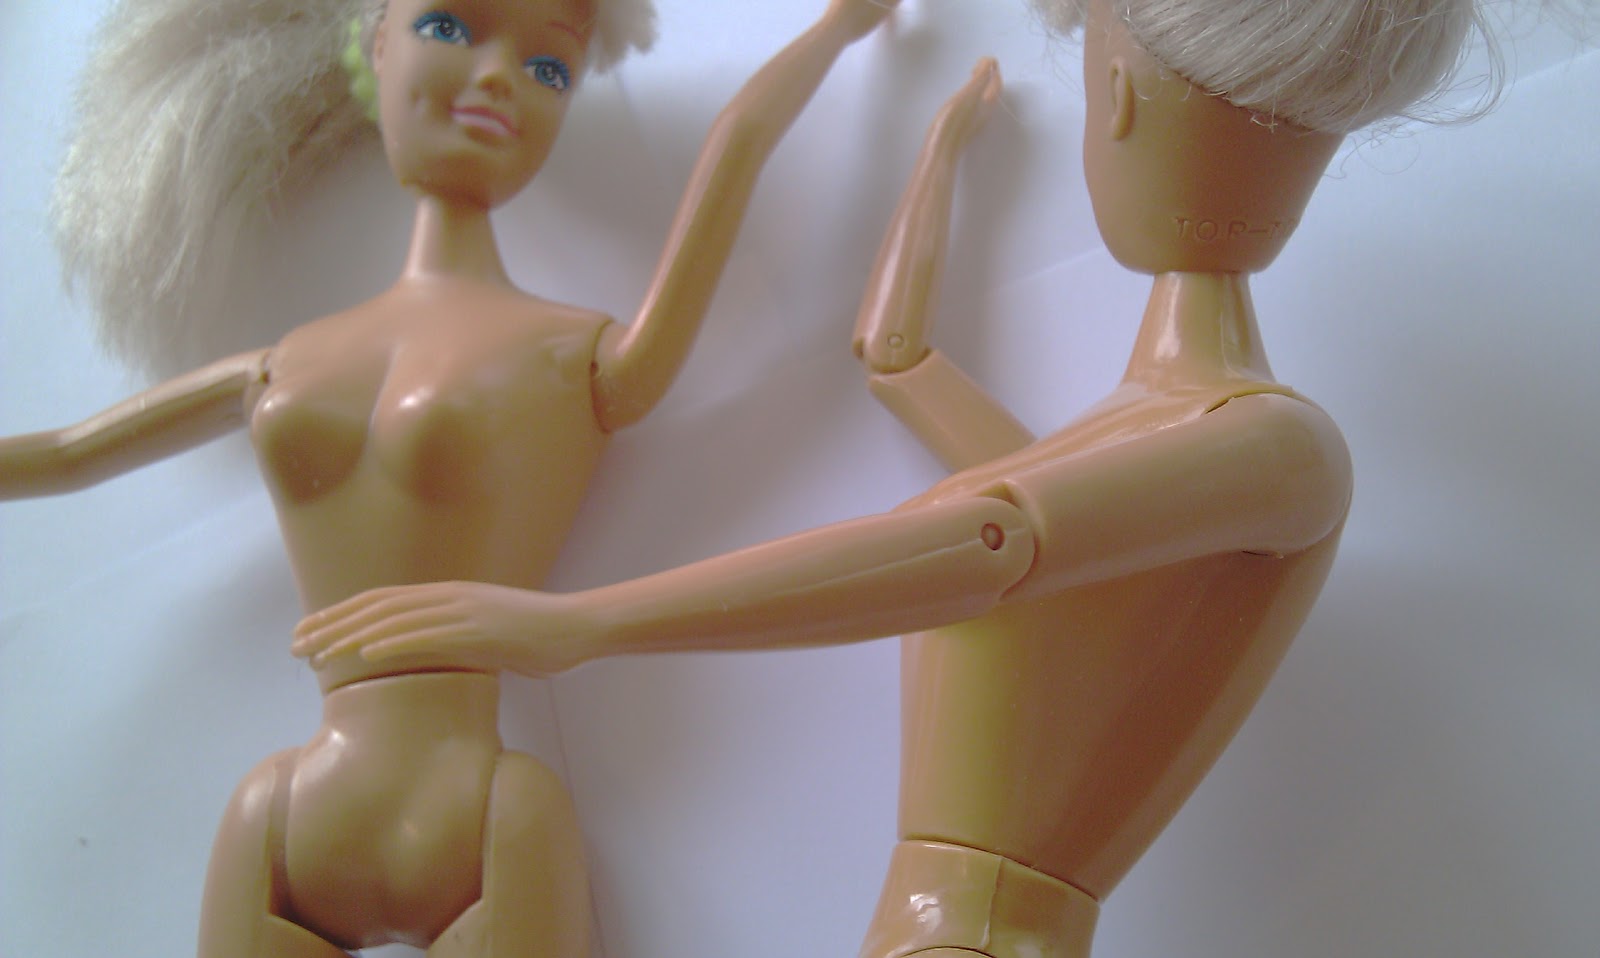 |
| -Quit hogging the camera! -Shut up, she needs a close up of the elbow joint! |
HOWEVER, I also noticed the joints were basically just a plastic plug through a hole... Hmmm! I've never done any doll surgery besides a few head swaps (funny how when it comes to dolls, a brain transplant is the least complicated procedure), but this felt like a good project for a beginner. I bought them both (two sets of clothing, yay!) and headed home for some frankendollying.
 |
| Shoulder pin on its way out |
I mean, talk about anticlimax - frankly, I was expecting at least some kind of disaster. But no: just push the plugs out with something hard and pointy (required some force at an awkward angle, but nothing worse), put good arms on good body, align the holes of the shoulder joint, and just ...pushing the pin back in again. That's it, that's all it took. I don't think I've ever seen joints this
Well, I took some pics of the process, so I might as well share them:
 |
| The crochet needle was the right size for pushing the pins through. |
 |
| Arms, pins, shoulder socket |
 |
| -Well, so long sis, I'm off with your arms! -What th- HEY! COME BACK HERE!! |
...and ta-daa! One non-yellowing doll with fairly tight joints and pretty good articulation! The articulated arms are not matte like the rest of the body, and have a slightly more yellowish tone, but it's hardly noticable. Originally I had planned to put the unarticulated arms on the donor doll and give her back to goodwill, but she's in pretty bad condition so I'm not sure it's worth it. I'll probably keep her for spare parts, in case I need some flat feet or something.
 |
| JUST YOU WAIT! I WILL HAVE MY REVENGE!!! |
...on second thought, I'm not sure I dare to keep her around!
Christie: Oh no oh no! Don't ever do that to me!
ReplyDeleteMe: Uh, you've already been frankendollied -_-;;
Christie: I have? Like... liposuction?
Me: Yes, yes just like that *sigh*
This is awesome, you are far braver than I!! It scares me just swapping their heads, hehe!
http://travelingtwig.blogspot.com
Amazing, who would have thought it would be so easy. Congratulations on your new doll.
ReplyDeleteCool! Congratulations on your success.
ReplyDeleteThe er ... donor doll ... maybe she could get "lost?" I'd worry when a doll vows vengeance ;-D
Oh, I should be safe as long as I don't reattach the arms. :D
Delete